| Last additions - The Legend of Zelda |

z4-silver-arrow.jpgSilver Arrow5361 viewsSources: Image from the Official Link's Awakening Nintendo Player's Guide. Scanned and Edited by Melora. Notes: I had to think about where I wanted to place this image. Since it was from the LA guide, but was illustrating back story for the original Legend of Zelda, I decided on this section.MeloraFeb 24, 2006
|
|
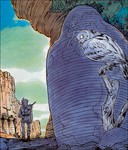
z3-link-ever-vigilant.jpgEver Vigilant3693 viewsSources: Image from the Official Link to the Past Nintendo Player's Guide. Scanned and Edited by Melora. The Illustrator was possibly Katsuya Terada. Notes: I had to think about where I wanted to place this image. Since it was from the LttP guide, but was illustrating back story for the original Legend of Zelda, I decided on this section. After defeating evil, Link remains ever vigilant.MeloraFeb 24, 2006
|
|
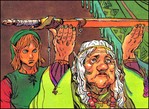
z4-impa.jpgImpa3595 viewsSources: Image from the Official Link's Awakening Nintendo Player's Guide. Scanned and Edited by Melora. Notes: I had to think about where I wanted to place this image. Since it was from the LA guide, but was illustrating back story for the original Legend of Zelda, I decided on this section.MeloraFeb 24, 2006
|
|
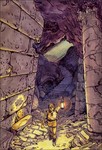
z3-link-in-dungeon.jpgDungeon Ruins3886 viewsSources: Image from the Official Link to the Past Nintendo Player's Guide. Scanned and Edited by Melora. The Illustrator was possibly Katsuya Terada. Notes: I had to think about where I wanted to place this image. Since it was from the LttP guide, but was illustrating back story for the original Legend of Zelda, I decided on this section. Great picture of Link in a labyrinth.MeloraFeb 24, 2006
|
|

z3-link-battles-gannon.jpgLink Battles Ganon6484 viewsSources: Image from the Official Link to the Past Nintendo Player's Guide. Scanned and Edited by Melora. The Illustrator was possibly Katsuya Terada. Notes: I had to think about where I wanted to place this image. Since it was from the LttP guide, but was illustrating back story for the original Legend of Zelda, I decided on this section. -Thought it would be fun to call him Gannon, like the original game text- silly me. Anyway, I love this picture of Link fighting Ganon, the silver arrow drawn for the final blow.MeloraFeb 24, 2006
|
|
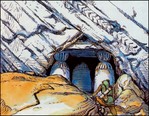
z3-link-dungeon-entrance.jpgLink at the Dungeons Entrance3479 viewsSources: Image from the Official Link to the Past Nintendo Player's Guide. Scanned and Edited by Melora. The Illustrator was possibly Katsuya Terada. Notes: I had to think about where I wanted to place this image. Since it was from the LttP guide, but was illustrating back story for the original Legend of Zelda, I decided on this section. -Link going to one of the mountain top dungeonsMeloraFeb 24, 2006
|
|

z3-link-and-zelda.jpgLink and Zelda5395 viewsSources: Image from the Official Link to the Past Nintendo Player's Guide. Scanned and Edited by Melora. The Illustrator was possibly Katsuya Terada. Notes: I had to think about where I wanted to place this image. Since it was from the LttP guide, but was illustrating back story for the original Legend of Zelda, I decided on this section. I love this end-game imageMeloraFeb 24, 2006
|
|
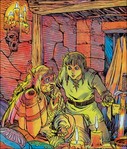
z3-link-and-impa.jpgLink and Impa3935 viewsSources: Image from the Official Link to the Past Nintendo Player's Guide. Scanned and Edited by Melora. The Illustrator was possibly Katsuya Terada. Notes: I had to think about where I wanted to place this image. Since it was from the LttP guide, but was illustrating back story for the original Legend of Zelda, I decided on this section.MeloraFeb 24, 2006
|
|

z3-link-and-monster.jpgDesert Hazards2963 viewsSources: Image from the Official Link to the Past Nintendo Player's Guide. Scanned and Edited by Melora. The Illustrator was possibly Katsuya Terada. Notes: I had to think about where I wanted to place this image. Since it was from the LttP guide, but was illustrating back story for the original Legend of Zelda, I decided on this section.MeloraFeb 24, 2006
|
|

z1mapstrat0-front.jpg9928 viewsOne side of the "Map and Strategies" foldout included with "The Legend of Zelda." Submitted by Mak.Mar 13, 2004
|
|

z1mapstrat1-back.jpg5263 viewsOther side of the "Map and Strategies" foldout included with "The Legend of Zelda." Submitted by Mak.Mar 13, 2004
|
|
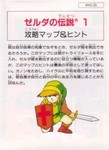
THF-mapguide.jpg2487 viewsFront of the "Map and Hint Guide" foldout included with the Famicom re-release of "Zelda no Densetsu."Mar 13, 2004
|
|
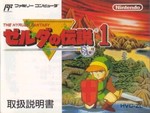
THF-booklet.jpg2872 viewsFront of the "Zelda no Densetsu" instruction booklet, from the Famicom re-release.Mar 13, 2004
|
|
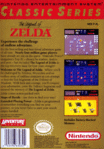
zelda1classic1-back.gif1667 viewsMar 13, 2004
|
|
zelda1classic0-front.gif1564 viewsMar 13, 2004
|
|
zelda1classic.jpg1475 viewsMar 13, 2004
|
|
zelda1cart.jpg1688 viewsMar 13, 2004
|
|
zelda1cartgray.jpg1435 viewsMar 13, 2004
|
|
zelda1.gif1673 viewsMar 13, 2004
|
|
zelda1box.jpg1531 viewsMar 13, 2004
|
|

z1j-fam-cart.jpg1431 viewsMar 13, 2004
|
|
z1j-fam-box2.jpg1245 viewsMar 13, 2004
|
|

z1j-disk-sideb.jpg1278 viewsMar 13, 2004
|
|
z1j-fam-box.jpg1382 viewsMar 13, 2004
|
|
| 385 files on 17 page(s) |
 |
1 |  |
 |
 |
 |
 |
 |
 |
 |
 |
 |
 |
|