Table of Contents
Main Page (ALttP)
Sections
This entire chapter is optional but I placed it here because it's fairly big for being a "Missing Links" subsection in the normal chapters and most of the items are, even though not necessary, quite useful in the later dungeons. Furthermore tempering the sword incerases your physical power allowing you to beat most of the monsters with much less hits. All of them require the Titan's Mitts (some indirectly) thus this would be the best location after obtaining the 4th Crystal.
Missing Links
The most important task if you ask me is upgrading your sword. Go south from the Village of the Outcasts, head left to find a strange frogger creature behind some dark green rocks. Lift them with the Titan's Mitts and talk to the little chap. He explains to you that he's one of the blacksmiths and requests you to return him to his brother in the Light world.
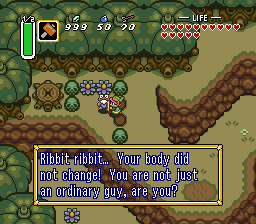
Walk back to the blacksmith shop and teleport back to the Light World (or vice versa; whatever you like best).
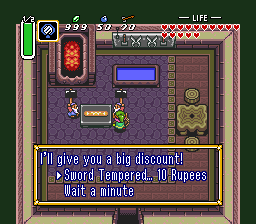
Enter the smithy's shop and his brother is reliefed to see his other half back. Exit and reenter the cottage, then talk to one of the dwarfs and ask them to temper your sword for 10 Rupees.
They do need to take possession of your sword in the meanwhile, so don't go out doing strange things like assaulting the next dungeon. It will fail. Instead collect Piece of Heart #19 and do the 4th Bottle Quest as written out below, because this allows you to wait the required time and these can be done safely without a sword.
After some time elapses go back and reenter the shop to the smithies at their work. Talk to them again and receive your new sword back.
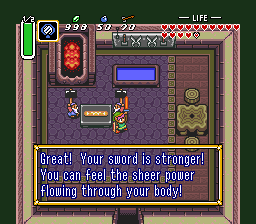
That's it! You got a stronger sword for doing almost nothing. They can only temper your sword once of course. Just hear it swing it sounds much heavier all of a sudden. The red blade does 33% more damage than the Master Sword and 3 times as much as your Uncle's sword did.
Empty Bottle (4/4)
The purple locked treasure chest |
|---|
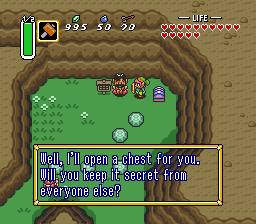
At the location where the Smithy's shop is in Dark Hyrule Link finds a small purple box. Touching it causes the following text message to pop up.
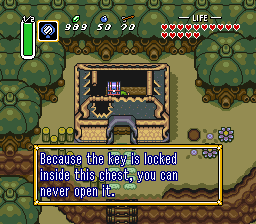
It tells you that the chest is locked and the key is inside. You need somebody to pick the lock for you... If you visited the most SE part of Dark Hyrule then you know from one of the characters in the caverns that there is an infamous lockpicker near the entrance to the Desert of Mystery. He looks like an average middle-aged man. So go back to the Light World and walk towards his location.
At the destination the middle-aged man is gald to offer you his assistance, provided that you keep his thieving skills a secret.
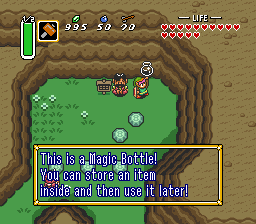
After a split second he manages to open the lid and the contents is yours. The fourth and last bottle is now for you to claim.
|
|
Piece of Heart (19/24)
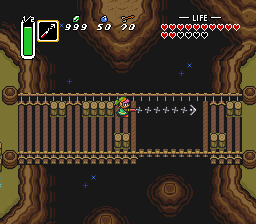
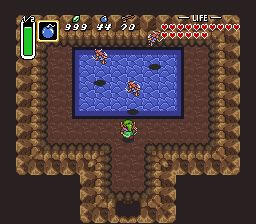
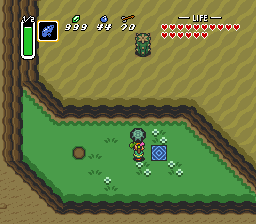
Stomp the pegs |
|---|
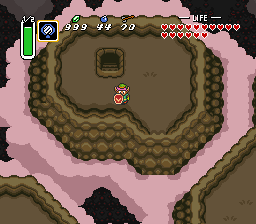
There's more going on near the Smithy's shop in the Dark world. Notice those 20 pegs in the bottom area. After you stomp all of them with the Magic Hammer a staircase pops up from nowhere.
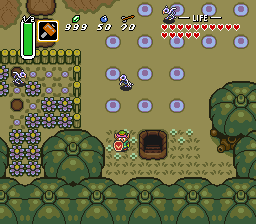
Go down it and find the Piece of Heart in the little cavern.
|
|
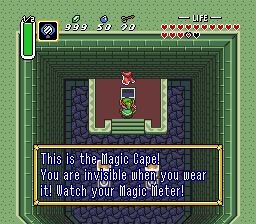
Magic Cape
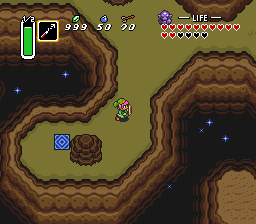
The treasure of the cemetery |
|---|
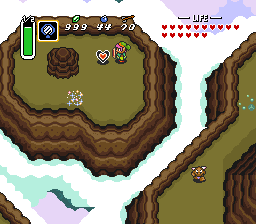
Go to the cemetery in the Light World and lift the dark green rocks in front of the upper right grave. Remove the two dark rocks using the Titan's Mitts and enter the stairs by dashing into the grave from below.

At the bottom you find a single chest. Open it to find the Magic Cape! This item grants the wearer invisibility, but it drains your magic meter constantly.
|
|
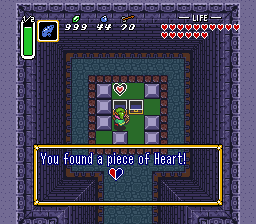
Piece of Heart (20/24)
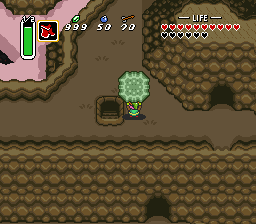
Unseen towards the goal |
|---|
In the dark world there's a sign near the entrance to Death Mountain. It reads out that you wearing a cape grants you the Piece of Heart on display.
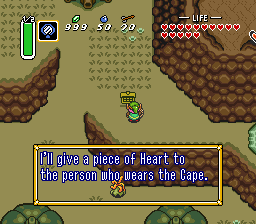
Enter the cave, go upstairs, use the Hookshot to pull yourself to the other side, then walk down to see a large bumper. There's only one way to pass it. Equip the fresh Magic Cape and activate it.
Outside the Piece of Heart awaits you. Which yields your 5th additional heart container given that you collected the previous 19 as well.
|
|
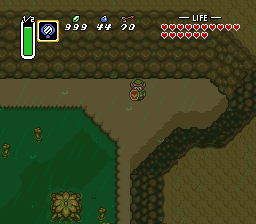
Exploring Death Mountain range
With the Hookshot and Magic Cape in tow you can explore the last sections of both Dark and Light sides of Death Mountain. Start in the Light world at the entrance to the old man (the bird can bring you here with the flute). Then go east as far as possible and use the Hookshot to grapple yourself over the canyon.
Walk to the right to find some Tektites and more rock creatures. AT the bottom of the area there is a single rock. Lift it to find a teleporter to the dark side.
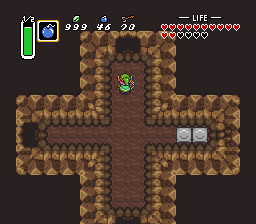
From here walk on to the east and enter Death Mountain via the left of the two entrances (the right one contains a shop). Work your way to the top floor, but note that sometimes you must fall down a gap to reach another section on the lower floor. At the top you can go either right to
Turtle Rock, left to the
Cane of Byrna or lift the rock here to find a
secret entrance.
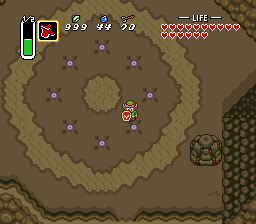
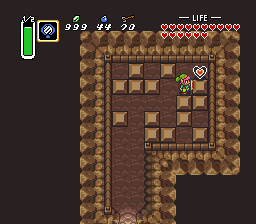
Piece of Heart (21/24)
Clearing the invisible path |
|---|
Enter the hidden stairway on the top of Death Mountain. Follow the path up to the dead end, then use Ether to reveal the hidden path here.
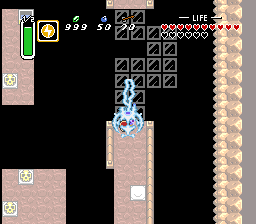
Walk over to the other side, bomb the back wall, then bomb the wall to the left in the room behind it and go down to reach the exit.
There's nothing here, or is there? All you have to do now is teleporting back to Hyrule using the Magic Mirror. The Piece of Heart awaits on the other side.
|
|
Faerie Pond (14/14)
Faerie Pond (15/14)
The other (big) Faeries of Death Mountain |
|---|
Enter the hidden stairway on the top of Death Mountain. Follow the path up to the dead end, then use Ether to reveal the hidden path here.
Walk over to the other side, bomb the back wall, then bomb the wall at the top of this room to find a big Faerie, but that's not all.
Bomb the left wall and, bomb the top wall again to find another hidden pond in this mountain. This time it contains three small Faeries.
|
|
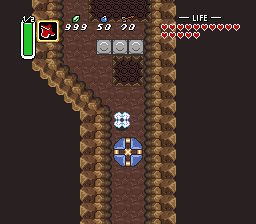
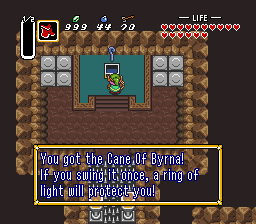
Cane of Byrna
The spiky cave near Spectacle Rock |
|---|
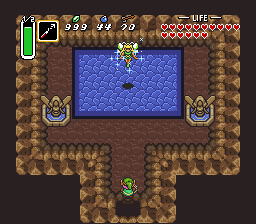
Remember the spiky cave on Death Mountain. Well, you can return to it and collect its treasure now that you have the Magic Hammer. Maybe you want the Magic Cape first as there will be a lot of damage if you don't. Return to the teleport as shown here.
Fall down the one passable section in the ledge here and enter the cave. Stomp the mole heads and run over the spike pit. If you have the Magic Cape this will save you many hearts.

At the end you find 8 skulls all containing recovery hearts (for the way back) and a chest with the legendary Cane. This cane will shield you from any damage as long as it is active, but it drains magic just as fast as the cape.
|
|
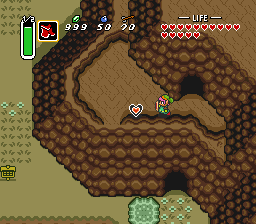
Turtle Rock
There are several ways to reach this place, but for now I'm only using the route as described above (i.e. by travelling up Death Mountain in the Dark World).
Pull four Blue Rupees from objects (6)
Turtle Rock's paw |
|---|
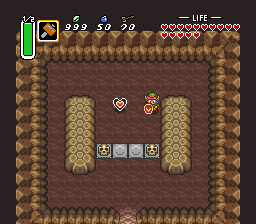
From the top of Death Mountain in the Dark World you can visit Turtle Rock. Pull its left paw (right for you) to find 20 Rupees.
|
|
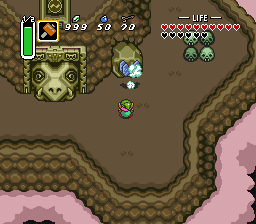
Swamp of Misery
Use the bird to reach the Desert of Mystery by playing the Flute in the Light World, then lift the right rock to find a teleporter to the Dark world. Enter it and you've reached the unreachable Swamp of Misery. Enter the upper right cave and pay the goon 20 Rupees for a hint on how to enter the 6th dungeon. Bomb the back wall to find some stocks.
Piece of Heart (22/24)
The chest on the left side of the Mire |
|---|
Warp to the Misery Mire and enter the left structure as shown here:
Push the blocks in such a way that the left chest becomes reachable. The right chest contains 20 Rupees and the left one contains the Piece of Heart you were looking for.
|
|
Piece of Heart (23/24)
The block maze in the Desert of Mystery |
|---|
Warp to the Misery Mire and walk to the upper right corner of the map. Use the Mirror here to return to Hyrule again.
Enter the cave and push the blocks like this. Push the upper block up, then the right block right, the upper block up, and so forth until you hit the corner. That's all there is to it.
|
|
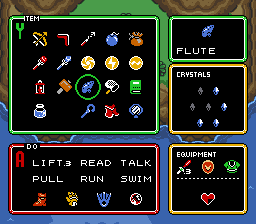
That's about it for the side quests in this game. The last Piece of Heart can only be reached from within dungeon level 8, so that has to wait. In any case your inventory should look something like this by now. Having 23 Heart Pieces means that the heart on display is 3/4 full. With only one missing piece of equipment to the left of the Cane of Byrna. That item will be found in the Misery Mire.
 Subscribe to RSS